squad.xml: Difference between revisions
(added arma uid, logo creation, publish, files, references) |
(added section "how to use it as a team-member) |
||
| Line 128: | Line 128: | ||
All files will have to be in the same directory! | All files will have to be in the same directory! | ||
== How to use it as a team-member == | |||
* You have to have your own member-block in the "squad.xml" file | |||
* Additionally you have to put the URL, where the "squad.xml" of your team is located, in the "Clanpage" field in the player edit-menu. As reference see the picture [[:Image:Squadxml uid 2.jpg|"ArmA UID 2"]] in section '''How to get your ArmA UID'''. | |||
== Files == | == Files == | ||
Revision as of 02:02, 24 January 2007
About
To support the Multiplayer-Community in their effort to play as teams, like many ArmA-clans and squads are trying, its possible to create a common information file - the "squad.xml" -, which is stored on a personal webspace and loaded by the ArmA-Gameserver, if a member of this team will there.
Beside detailed informations about the single player and its team which can be gained by pressing "P" ingame, the feature supports also a common logo, which will be displayed on vehicles, if such team has boarded it.
How to create a "squad.xml"
The file consist of three main parts:
1. Head: defines the doctype. Just leave it!
<?xml version="1.0"?>
<!DOCTYPE squad SYSTEM "squad.dtd">
<?xml-stylesheet href="squad.xsl?" type="text/xsl"?>
2. Squad properties
<squad nick="[cHoe]">
	<name>Chaos-Hoernchen</name>
	<email>[email protected]</email>
	<web>www.chaos-hoernchen.de</web>
	<picture>choe_logo.paa</picture>
	<title>Chaos-Hoernchen</title>
| nick | The clan-tag, is displayed together with players nickname. Attention: Don't use reserved XML tags -> Link |
|---|---|
| name | Squad name |
| Your contact email | |
| picture | Your logo (optional), it has to in the same folder as the "squad.xml" file |
| title | Squad name, displayed on vehicles manned by squad members |
3. Member list
<member id="123456" nick="John">
		<name>John Doe</name>
		<email>[email protected]</email>
		<icq>N/A</icq>
		<remark>Mostly harmless</remark>
</member>
</squad>
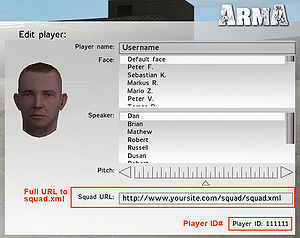
| id | your ArmA-UID, always the same and irrespective of your selected character |
|---|---|
| nick | your nick, the same as used with your selected character |
| name | your "real" name... |
| your personal email | |
| icq | your personal icq number |
| remark | as the name says it... |
Remarks:
- You can leave any field blank, but it's recommended to fill it with a "N/A" instead.
- Extend the members list by adding another XML-"Member" block
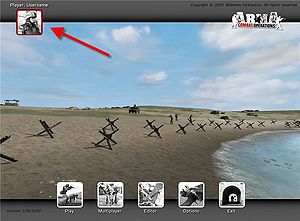
How to get your ArmA UID
How to create a logo for the use with "squad.xml"
To create a logo for the use with "squad.xml" you'll need:
- a bitmap manipulating software (aka "Paintprogram") which is able to handle bitmaps in TGA or JPG format.
- Download Texview or the PAA-Plugin for the use with Photoshop
For a logo without transparency you can use an ordinary JPG without further treatment. To get transparency you'll have to convert a TGA to PAA format. Its always recommended to use PAA and to avoid alpha blending.
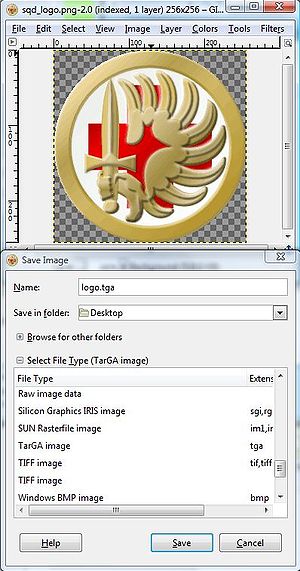
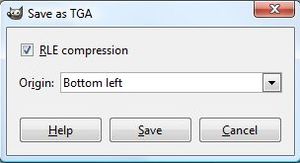
Create the TGA
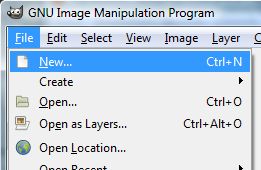
In this tutorial we'll use GIMP - a open source tool - to create our sample-logo.
Important note: All logos must a have resolution of 2^x / 2^y (e.g. 16 / 16, 32 / 32, 64 / 64, 256 /256)
Convert TGA to PAA
- Start TexView
- Open your "logo.tga"
- Save it as "logo.paa" (replace *.tga with *.paa in the "save as"-dialog)
Remark: Your are absolutely free to name your logo as you like. The filename "logo.tga" etc. is just an example!
How to publish it
To use the "squad.xml" you'll have to upload the following files to a webspace:
- squad.xml (mandatory)
- squad.dtd (mandatory)
- squad.xsl (optional), needed to show the "squad.xml" in a webbrowser, but isn't needed by the ArmA gameserver
- mylogo.paa (optional)
All files will have to be in the same directory!
How to use it as a team-member
- You have to have your own member-block in the "squad.xml" file
- Additionally you have to put the URL, where the "squad.xml" of your team is located, in the "Clanpage" field in the player edit-menu. As reference see the picture "ArmA UID 2" in section How to get your ArmA UID.

