R3vo/Sandbox1 – User
mNo edit summary |
mNo edit summary |
||
| Line 13: | Line 13: | ||
{{Feature|warning|The more markers you place, the more accurate your frontline will be, but the calculation will be more expensive and generating the data will take longer.}} | {{Feature|warning|The more markers you place, the more accurate your frontline will be, but the calculation will be more expensive and generating the data will take longer.}} | ||
== 3. Start Preview == | == 3. Start Preview == | ||
Revision as of 18:29, 28 July 2023
Tutorial
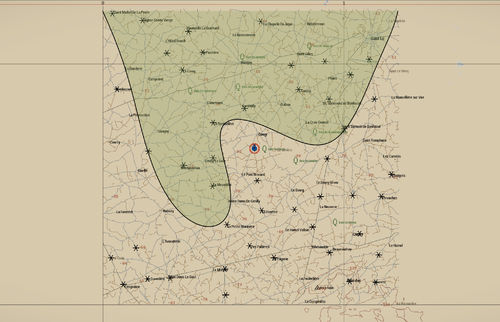
This page explains how to draw a frontline on the map similar to how it is done in the Operation Cobra campaign of the Spearhead 1944 CDLC.
1. Create Layer
Create a layer in Eden Editor called Frontline Control Points. This layer is referenced by the function to generate the frontline data points.
2. Create Markers
Inside that layer, create as many markers as needed to shape the frontline (The wavy black line). These markers act as control points for bezier interpolation and their position will influence the curvature. The markers will automatically be hidden at mission start.
3. Start Preview
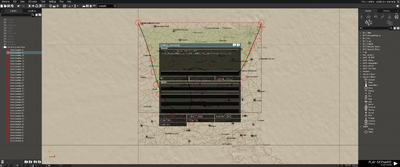
Execute the following code in the Arma 3: Debug Console from within Eden Editor to create a real-time preview of the frontline. Close the window that shows up for now. We will need it later.
4. Shape Frontline
Now drag the previously placed markers to shape the frontline. You can also add new markers by copy and pasting an existing one.
5. Generate Data
Once you are happy with the shape of the frontline, execute the following code again in the Arma 3: Debug Console from within Eden Editor. Instead of "preview" quality, use "high", "very high" or "ultra" instead.
6. Create Data File
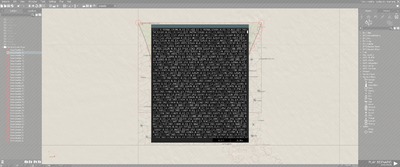
Once the data was generated a window will show. Copy the content of the window and paste it into a script file. Place this script file into your mission folder. In our case we call it frontline_data.sqf and place it into the root of our test scenario.
7. Add Code
Add code that creates frontline for every client to the init.sqf. The script has local effect and thus needs to be run on every connecting client. Clients without interface are automatically excluded (headless clients, dedicated server).
init.sqf
Function Syntax
Description
Previews a frontline in Eden Editor, or depending on parameter, generates data for it so it can be created during runtime.
Syntax
Parameters
| Index | Data type | Description | Default value |
|---|---|---|---|
| 0 | Array | Data for placing the fill markers inside frontline. If this data is provided the function assumes that the frontline should be created during mission runtime. Leave this empty for previewing in the Editor | [] |
| 1 | Boolean | True to draw axis area, false to not | false |
| 2 | String | Quality setting of the exported data
|
"preview" |
| 3 | String | CfgMarker color of the inside fill | "SPE_ColorAllies" |
| 4 | String | CfgMarker color of the outside fill | "SPE_ColorAxis" |
| 5 | Number | Alpha of inside marker | 0.6 |
| 6 | Number | Alpha of outside marker | 0.6 |
| 7 | Number | Interpolation quality of the border. Lower value means it's smoother, but generates more data | 0.002 |
Example Scenario
Limitatons
As of Spearhead 1944 v1 there are some limitations:
- Only one frontline can be drawn
- Frontline can only be drawn from top to bottom e.g. as shown in the images above
- Outside area marker can be drawn on top of inside area markers. This will be fixed with
 2.14
2.14


