Game Master: Image Generation Tutorial – Arma Reforger
Generate Images
Load World
In World Editor, load worlds\Editor\Slots\AssetImages\Eden_AssetImages.ent
Adjust Screen Resolution
Select SCR_EditorImageGeneratorEntity in default layer. Doing so will show current and target resolution in top left corner. Readjust the viewport to make values match.
Set Output Format
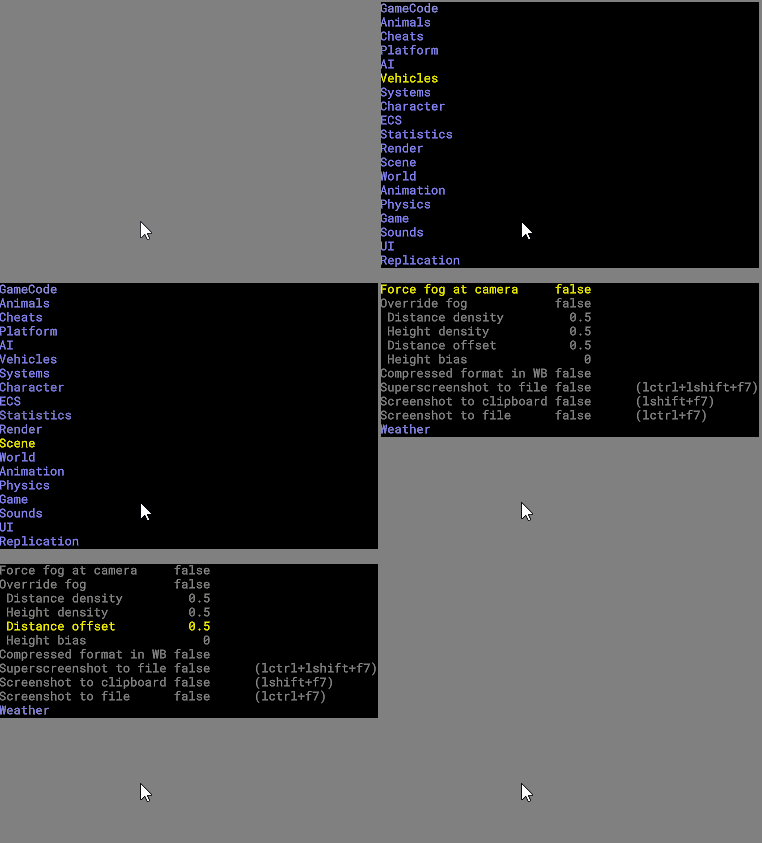
In diagnostic menu, set Game > Compressed format in WB to true
Select Prefabs
In World Editor's resource browser, select prefabs (*.et) you want to capture.
Don't worry about selecting extra files like prefabs of parts of *.conf files, they will simply be ignored.
Play
Play the world. The system will spawn all selected prefabs one by one and take a screenshot of each of them.
The system will spawn the entities on locations with matching labels. If the location does not match, or no location can be found, check the labels in the EditableEntityComponent of the prefab you are trying to capture images of.
Note that this component only exists on Editable versions of prefabs, with the exception of Characters, Groups, and Vehicles. Because of this it is important to select the right prefab type when taking images.
Configure World
Create manager
Insert SCR_EditorImageGeneratorEntity in the world.
Create a position
Insert SCR_EditorImagePositionEntity in the world.
- Set to entities of which labels it belongs, as well as time and weather used when the position is activated.
- A position is selected when all its labels are part of the queried prefab. Any extra labels the prefab may have are not taken into consideration.
- Example: A position marked as VEHICLE, TRUCK will be picked for prefab with VEHICLE, TRUCK, US, GREEN, but not for VEHICLE, CAR, US, GREEN
- Optionally set preview mesh used to represent the position.
- For groups, place entities of the same type as children of the position entity. Each of these sub-positions will serve as a slot for individual soldier.
- For characters, or characters in groups, animation poses can be configured
- Select the right source by configuring the Graph, Instance, and Start Node
- Set the ID to set up the desired pose
- Force weapon type if the character might not hold this weapon by default. E.g. an AT Soldier
- It is recommended to give the image position a name which helps identifying the position in the hierarchy.
Create a camera
Insert SCR_CameraBase as a child of the position entity and add Hierarchy component to it.
- Use Set entity to view orientation plugin to move the camera to where World Editor's camera is. This will copy only position and rotation, not FOV!
- Optionally add SCR_PostProcessCameraComponent with custom post-process effects.
- Enable Show Debug View Cone to see where the camera is pointed to even in World Editor.
Test the position
Play the world with desired position entity selected. This will activate only this position, while ignoring all the others.
You still need compatible prefabs selected in World Editor's resource browser.
Repeat
Return back to set 2 and place as many positions as you need to cover all prefabs.

