Weapon Collimator Sights – Arma 3
Intro
(Written by Alwarren. Thank you to LiquidPinky and da12thMonkey for their help. See the Forum thread for more info http://forums.bistudio.com/showthread.php?153485-How-to-get-the-Collimator-sights-to-work)
This is a short tutorial on how to get working collimator sights in Arma 3. A real-life collimator sight works by projecting beam of collinear light onto a point at infinity. Essentially, we simulate that by placing our red dot or Holo sight at the end of a long tunnel. The only trick is to hide the red dot when not looking through the sight's projection glass.
This tutorial assumes you already have a sight you want to modify. It also assumes moderate knowledge of the tools like Oxygen 2 and the modelling package you are using. Some screenshots are from Blender, but they apply to any package, including MAX or Maya.
In your Modelling Package of Choice
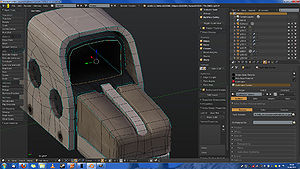
All of the following (except specifically noted) is done with the PILOT view of the model. You do not need to add anything to the non-PILOT views. In order to hide the reticule from view, it is placed at the end of a long transparent tube that will obstruct any vision of the reticule and nothing else. Assume the following Holo sight:
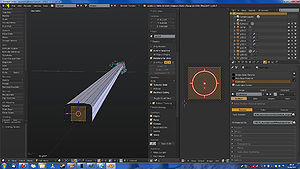
Grab the indicated edge loop, duplicate it (Control-D in Blender), then extrude a long, slightly tapered tunnel from it (Press 'E' in Blender). The result should look something like this
Make sure that the normals are correctly pointing outside. At the end of the tunnel, place a quad with your reticule mapped onto it. If you had a previous reticule, you can translate that to the end of the tunnel. You will likely have to scale it up a bit since it is now pretty far away from the viewer. A factor of 2 should do, but that is something that needs experimenting. Make sure to assign the right texture to it, and uv-unwrap it. Also, make very sure that the reticule is on the same axis as your 'eye' selection in the Memory LOD, or the weapon will not shoot correctly.
Export your model as normal, and load into Oxygen 2.
In Oxygen
With the first LOD selected, add the named property 'forcenotalpha' and make it a value of 1. If you cannot find the named property window, press Control-1 to open it. If your model has a geometry LOD, repeat this step with that one as well, setting the 'forcenotalpha' property to 1.
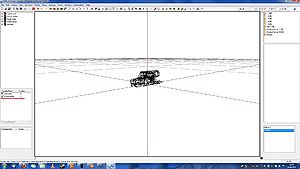
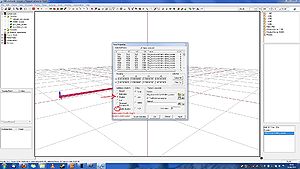
Switch to the pilot view LOD. Select the polygons that make up the tube, and press 'E' to get the Face properties. Refer to the following image:
Make sure to enable "Position" in Lighting and Shadow, and make sure that "Enable Shadow" is off. You might need to click the checkbox twice. Next, you need a texture of any size that has a very low alpha channel value. The easiest way to get this is by entering "#(argb,8,8,3)color(0,0,0,0.01,co)" in the texture field, but if you have a file texture, that will also do. Click "OK" to dismiss the window.
With the faces (and only these faces) still selected, go to the 'Faces' menu and select "Move top".
Now select the face(s) of your reticule (and only this/these face(s)) and again select "Move top" in the 'Faces' menu.
If you sight has a glass face (like the glass of an Eotech), select the glass now and select "Move top" in the 'Faces' menu one more time.
Putting it together
Pack your addon normally, for example with BinPBO. You're done. Really, there isn't anything more to do. Put your sight on a weapon, and observe the behavior in Arma 3. You might need to tweak the size and/or material settings of the reticule to make it appear satisfactory.


