Data Modding Basics – Arma Reforger
(→Using "Inherit Prefab in Addon" function: fixed typos) |
|||
| Line 396: | Line 396: | ||
Once '''GUID''' is obtained, it can be manually typed into meta file of some newly created model. After that action is completed, restart of the '''Workbench''' might be necessary. | Once '''GUID''' is obtained, it can be manually typed into meta file of some newly created model. After that action is completed, restart of the '''Workbench''' might be necessary. | ||
{{Clear}} | |||
== Replacing script == | |||
{{GameCategory|armaR|Modding|Tutorials|Assets}} | {{GameCategory|armaR|Modding|Tutorials|Assets}} | ||
Revision as of 12:09, 2 March 2023
Content Moddability Overview
Can Be Replaced
This means that certain resource can be fully replaced. Usually such resources are created manually by creating same asset with same GUID
Can Be Modified
Certain elements of the resource can be modified while rest of them is kept
Can Be Inherited From
A new resource can inherit from an existing file:
Moddability table
| Extension | File Type | Can be replaced | Can be modified | Can be inherited from |
|---|---|---|---|---|
|
.et |
Prefab | |||
|
.conf |
Config | |||
|
.xob |
Model | |||
|
.emat |
Material Definition | |||
|
.edds |
Enfusion DDS Texture | |||
|
.c |
Enforce Script Source | |||
|
.layout |
Layout Definition | |||
| .ptc | Particle System Definition | |||
|
.ent |
World Scene | |||
|
.layer |
World Layer | |||
|
.bt |
Behavior tree | |||
|
.anm |
Animation file | |||
|
.agf |
Animation graph file | |||
|
.agr |
Animation graph | |||
|
.aw |
Animation Workspace | |||
|
.asi |
Animation Set Template | |||
|
.pap |
Procedural Animation | |||
|
.siga |
Procedural Animation Signal | |||
|
.st |
String Table | |||
|
.acp |
Audio component | |||
|
.sig |
Signal (Audio) | |||
|
.wav |
Supported audio file format |
Footnotes
- ↑ 1.0 1.1 1.2 1.3 1.4 Following assets are always overridden and cannot be fully replaced
- ↑ Script files are fully replaced if script in other addon (filesystem) has same path as the one which is supposed to be replaced. For example AIAutotest.c located in $ArmaReforger:scripts\Game\AI\ will be replaced by variant from Addon1 if it is placed in same location and same name in Addon1 file system - $Addon1:scripts\Game\AI\ AIAutotest.c
- ↑ Usage of modded keyword is required + few other restrictions apply like method in class must not be private in order to allow overloading it
- ↑ Behavior trees attempts to override each other, instead of replace
Data manipulation
Basics
In principle, any file with meta file and unique GUID - global unique identifier - can be be overridden or replaced . This means however, that files without meta file have to be modified in different way (scripts ) or cannot be replaced at all.
That means that for instance models, textures, layout, prefabs, configs or animations can be replaced using this method.
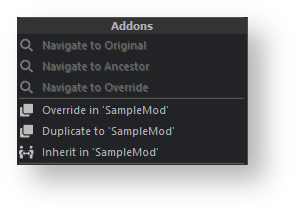
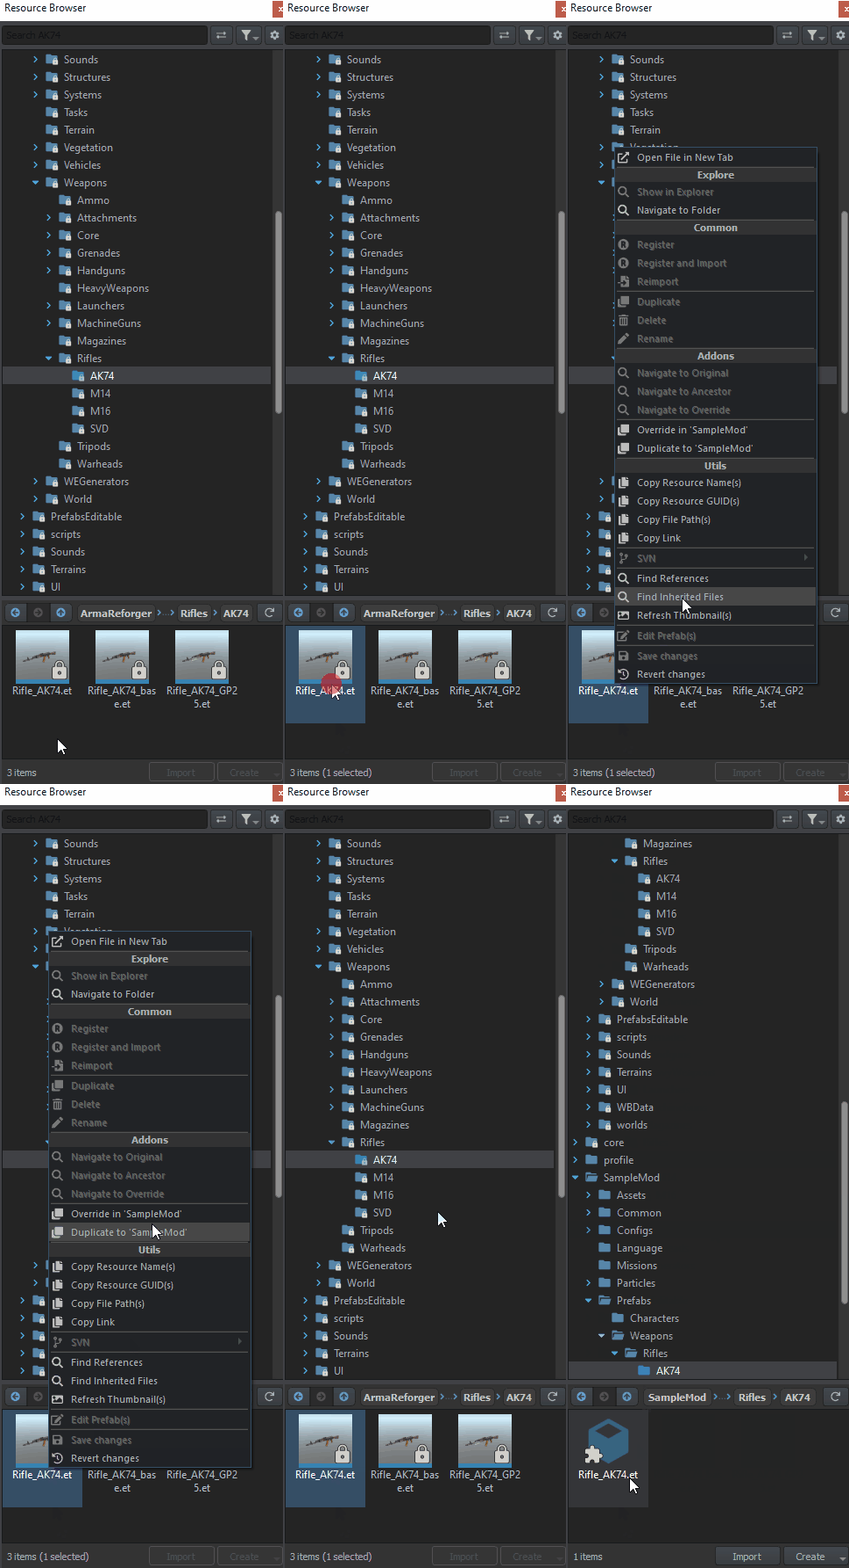
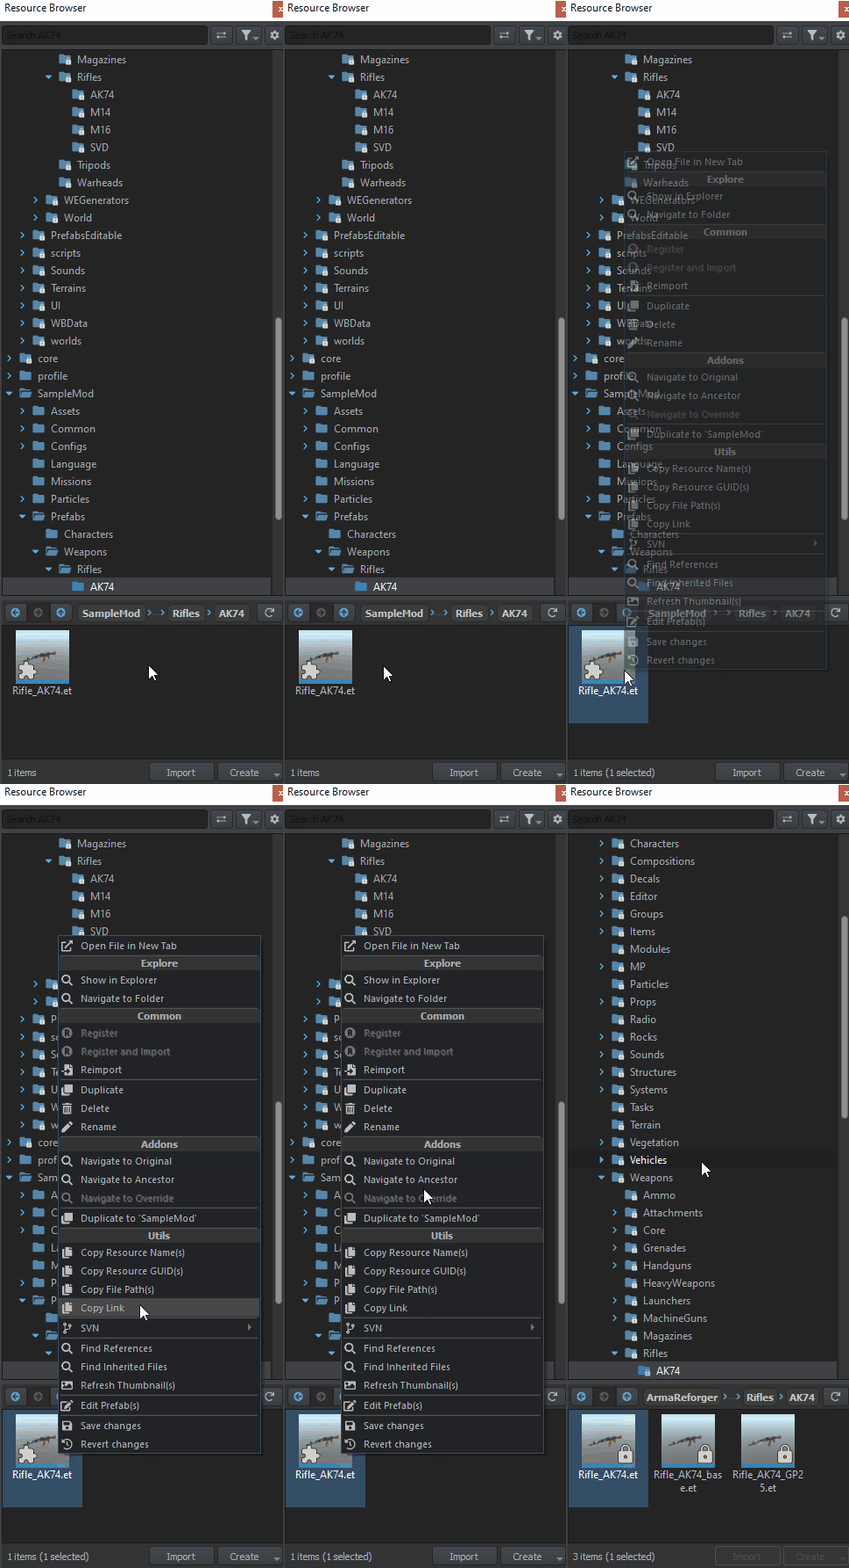
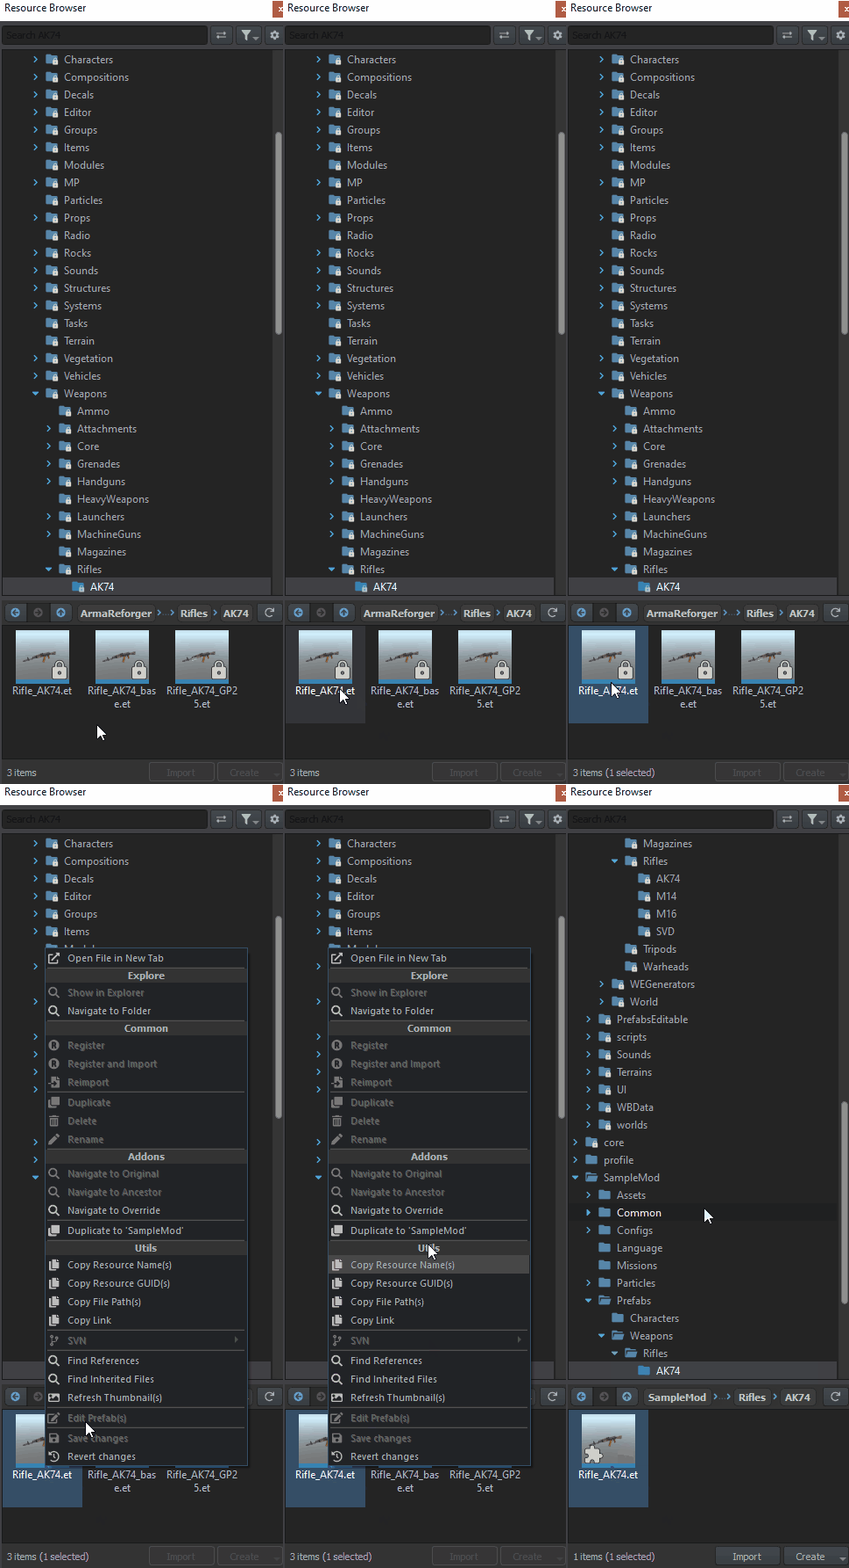
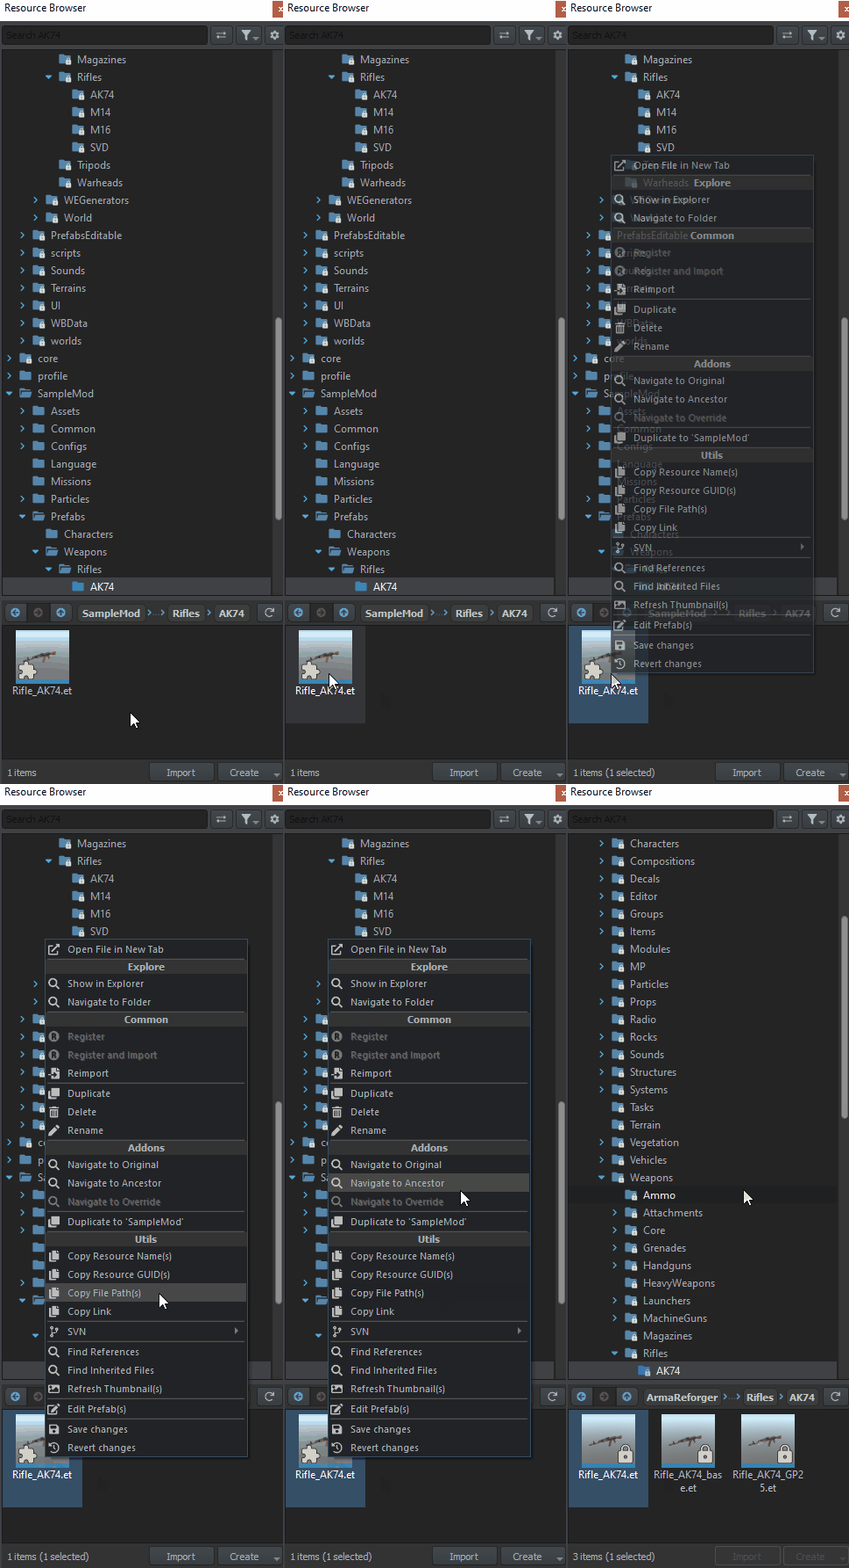
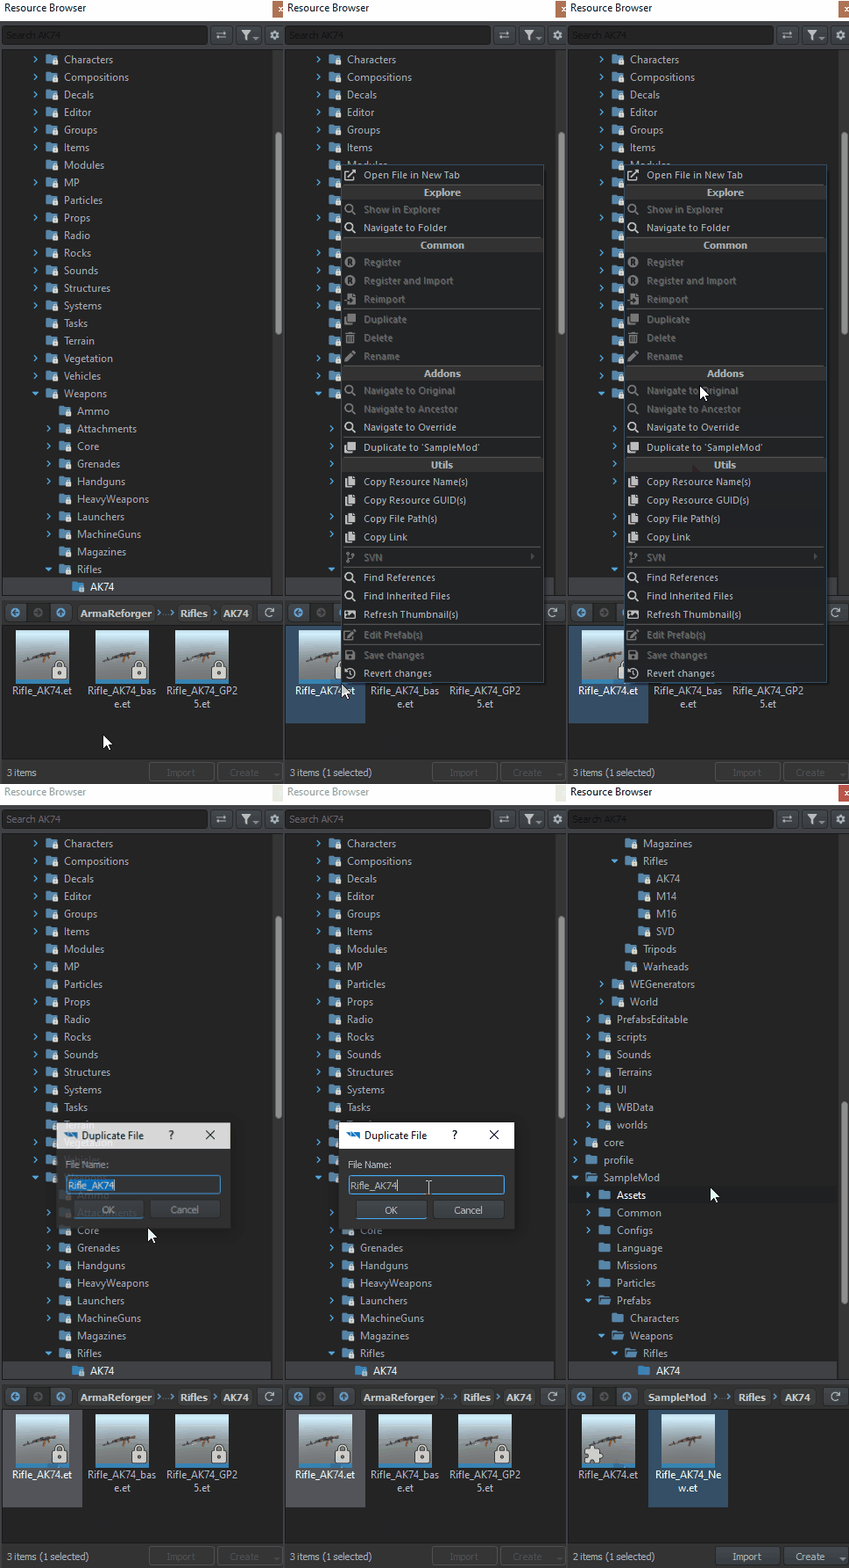
Creating overrides, duplicates or inherited files can be performed from context menu which is available in Resource Browser. This menu is visible after clicking with Right Mouse Button on selected asset. Availability of the actions depends on the type of the assets, so for instance models (XOBs) have only Navigate to ... options.
Overriding assets
Using "Override in..." function
"Override to..." function can be used to modify (override) existing assets like configs, layouyts or prefabs.
Once you have file in addon which is overriding some data, you can quickly navigate
Scripts
In Enfusion it's possible to modify already existing scripts by using some of special keyword
- modded - keyword used to modify existing scripting class
- override - keyword to override methods in modded classes
- super - allows you to invoke content of overridden method
Modded keyword
Override keyword
Super keyword
Using "Duplicate to..." function
In Resource Browser you can quickly create new, duplicated file in project you are currently working on. This file is exact copy of original file and will be used from that point when any part of the game will try use asset with this GUID. Any changes that you are going to do to that file are going to be applied applied to that copy are not going to be propagated to it.
Inheriting
Using "Inherit in..." function
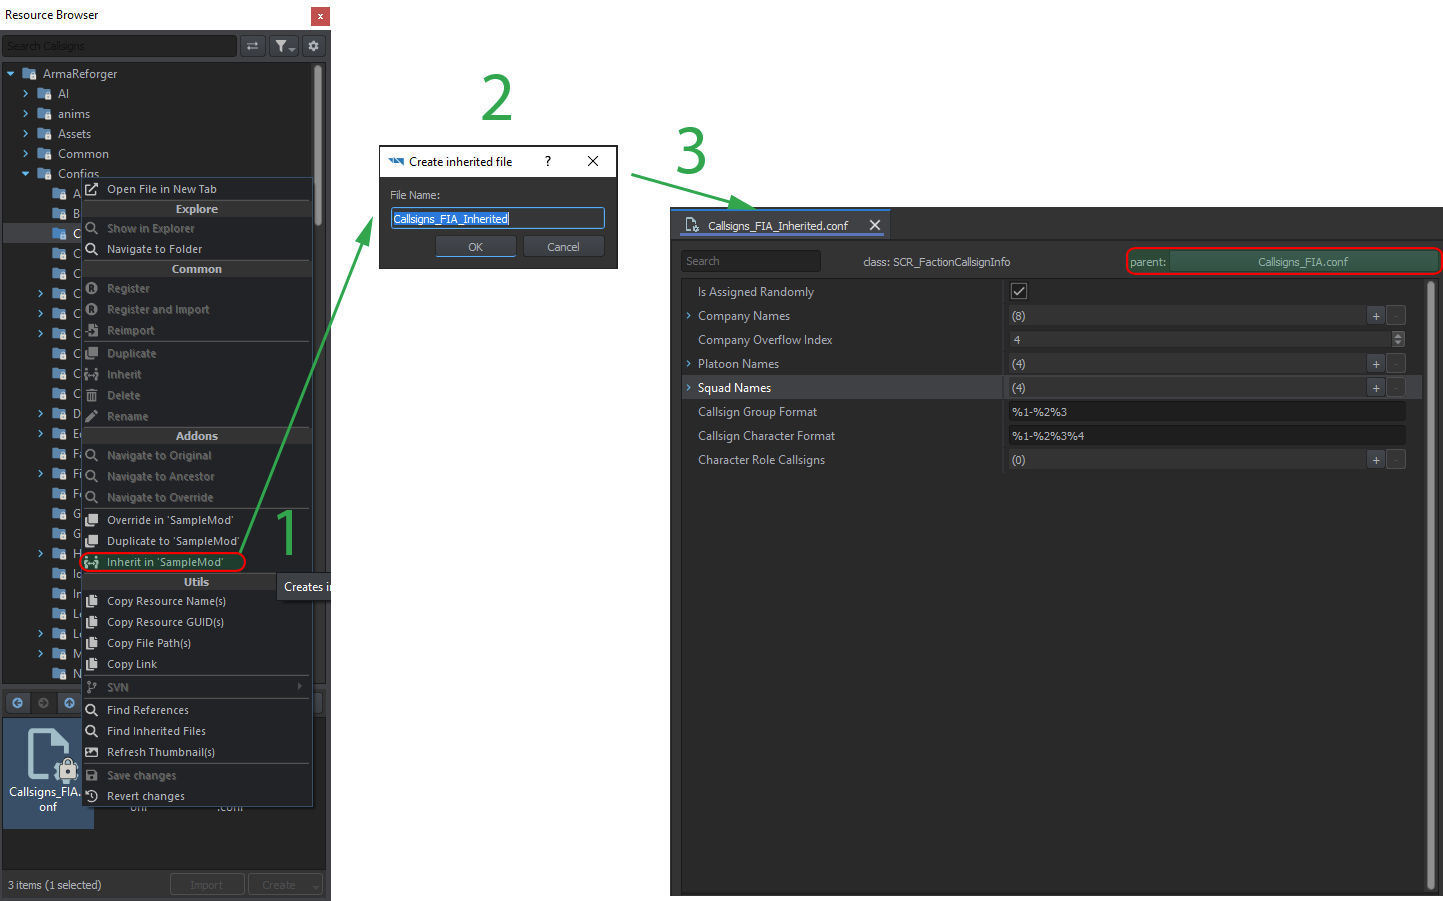
Inheriting from the config files or layouts can be performed via "Inherit in..." function. After clicking with Right Mouse Button on appropriate file and then selecting Inherit in function, a new pop up window will appear asking for a new file name. Once name is confirmed, a new file will be created in working addon with same folder structure as original file. As expected, all of the attributes will be inherited from parent file.
Using "Inherit Prefab in Addon" function
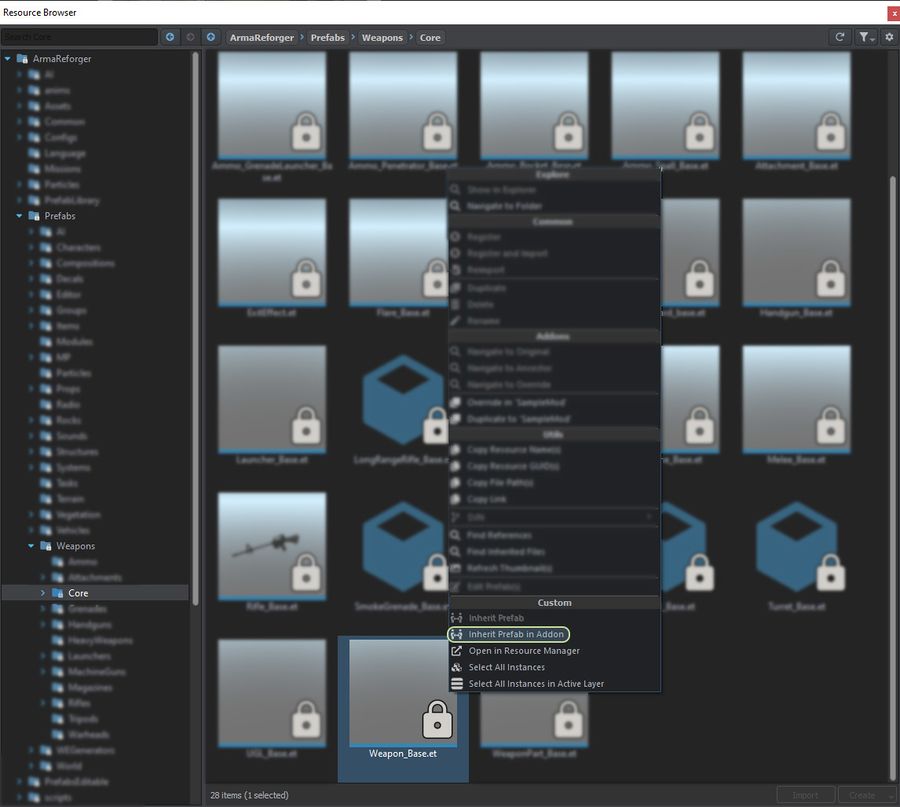
Prefabs are special case since inherit operation is only available in World Editor. When clicking with right mouse button on prefab in Resource Browser attached to World Editor, there are two additional actions available in Context Menu - Inherit Prefab and Inherit Prefab in Addon.
When dealing with read-only files, Inherit Prefab in Addon is especially useful, since it will create new prefab (with custom name) in current working addon retaining folder structure of original prefab.
Replacing assets
Replacing assets means that i.e. AK-74 model can be with a simple gray box and all prefabs which are referencing that AK-74 are going to use that new gray box from now. Such replacement can be performed with sounds, models, textures, animations, particle effects, world files or behavior trees.
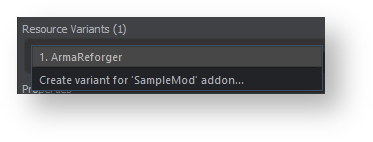
In Particle Editor replacement can be performed quite easly by using "Create variant for "..." addon..." function. This action creates new ptc file with same GUID and content as original file.
In all other cases, replacing files is slightly more complicated and requires operations outside of Workbench.
Getting file GUID
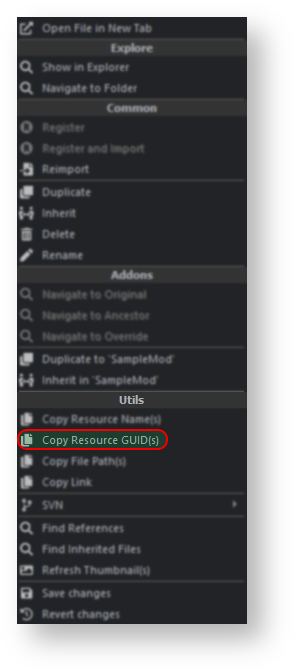
First step towards creating such replacement would be obtaining GUID - this can be done via Copy Resource GUID(s) action, available in context menu after clicking on file with Right Mouse Button.
Once GUID is obtained, it can be manually typed into meta file of some newly created model. After that action is completed, restart of the Workbench might be necessary.

