Code34/Sandbox – User
General cases
There are three ways to create animations:
- about vehicles or objects, you will have to use Model Config.
- about characters, animals, then you have to use a CfgMoves Config Reference.
- about a part of character, animal while a CfgMove animation is running, you have to use a CfgMoves & CfgGestures.
The difference between the three methods is that the config model permits simple animations (like rotations around axes), while the other methods permits more complex animations (with actions & states) described in a RTM file. The three methods must be declared in an adddon file.
Quick start: Model Config example
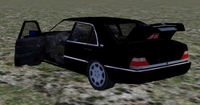
This example talks about simple, single-p3d animations, where parts of a model rotate around an axis (like a car door, or a tank turret).
To create a model animations, there are requirements:
- Create the movable object in the ResolutionLOD and give it a name.
- If the animation would affect the ( Fire) GeometryLOD, copy the selection into those LODs as well.
- In the MemoryLOD define the rotational axis via two vertexes. Select both of those points and give them a name.
- Still in the MemoryLOD create a single vertex (this will be the 'action point') and give it a name.
The following example is for an object that has been named 'door', which turns around an axis named 'door axis'. The 'action point' (the position the player has to be close to, in order to be able to activate this animation) is called 'doorbell'. In the Config.cpp for your model you need to define two classes: Animations & UserActions. The Animations class defines how the object moves, and the UserActions class defines when it moves.
config.cpp
class CfgModels {
	class door {
		class Animations
		{
			class MoveDoor
			{
				type = "rotation";	// always "rotation"
				animPeriod = 1;		// how long it takes for the movevement to finish
				selection = "door";	// the name of the moving object
				axis = "door axis";	// the name of the axis
				angle0 = 0;			// the start angle
				angle1 = -2.0;		// the end angle, in radians (= degrees/57.3 = degrees * 180/pi)
			};
		};

		class UserActions
		{
			class OpenDoor // action to open the door
			{
				displayName = "Open Door";	// string that's displayed in the action menu
				position = "doorbell";		// name of the 'action point'
				radius = 1.5;				// how close the player has to be see this action
				condition = "this animationPhase ""MoveDoor"" < 0.5";	// check whether the door has moved already
				statement = "this animate[""MoveDoor"", 1]";			// and if not, then start the animation
				onlyForPlayer = true;		// requirement by ArmA - presumably defines if AI can/cannot open doors etc
			};
			class CloseDoor // action to close the door
			{
				displayName = "Close Door";
				position = "doorbell";
				radius = 1.5;
				condition = "this animationPhase ""MoveDoor"" < 0.5";
				statement = "this animate[""MoveDoor"", 0]";
				onlyForPlayer = true;
			};
		};
	};
};
Quick start: CfgMoves example
This example describes the simplest case to create your own animation for a character already existing in arma. It is therefore not necessary to create the 3d object here.
To create a CfgMoves animation, you must follow these steps:
- Create your animation file with an external tool like Blender, and the ArmagRig pluggin.
- Export it to RTM file format with Armatoolbox
- Prepare your addon with your RTM and the config file
The config file of your addon must describes your animation in the Cfgmoves section. It is not mandatory to binarize it.
In this example, we will use:
- the standard skeleton of arma characters,
- the standard cfggestures of arma characters,
- a standard animation class as a parent class. Your animation class will inherit of the properties of this class.
config.cpp
class CfgPatches {
	class myanimation {
		requiredVersion = 0.1;
		requiredAddons[] = {"A3_Data_F_Enoch_Loadorder"};
	};
};
class CfgMovesBasic; // Reference CfgMovesBasic.
class CfgMovesMaleSdr: CfgMovesBasic // Override CfgMovesMaleSdr
{
	skeletonName="OFP2_ManSkeleton";
	gestures="CfgGesturesMale";
	class States
	{
		class CutSceneAnimationBaseSit;
		class myanimation : CutSceneAnimationBaseSit
		{
			looped = 0; // turn in loop or not
			speed = -5; // duration of your animation in seconds * -1
			file = "myanimation\Anims\youranimation.rtm"; // your animation path
			canBlendStep = 0; // sliding effect on/off
			minPlayTime= 1; // minimun time before the animation can be interrupted
			InterpolateTo[] = {"AmovPercMstpSnonWnonDnon", 2}; // next animation after this one
		};
	};
};
To play ingame your animation, you have to use the switchmove command
Quick start: CfgGestures example
Not documented enough for the moment. CfgGestures must be declared in the same way as Cfgmoves. But, it will be necessary to check that the action section is also declared.
To play ingame your animation, you have to use the playAction command
Complex case
It is possible to create much more complex animations. You can for example create your own characters, your own animals using their own skeletons. It is also possible to use motion capture via blender and object builder.
It is recommended to first practice with the standard characters to better understand the general operation.

