R3vo/Sandbox1 – User
mNo edit summary |
|||
| Line 25: | Line 25: | ||
4. Open the [[Arma 3: Debug Console]] and execute the following code: | 4. Open the [[Arma 3: Debug Console]] and execute the following code: | ||
<code>([[flatten]] [[getMissionLayerEntities]] "QRF") [[apply]] { _x [[enableSimulationGlobal]] [[true]]; _x [[hideObjectGlobal]] [[false]]; };{{cc|This will show all entities inside the layer and enable their simulation}}</code> | <code>([[flatten]] [[getMissionLayerEntities]] "QRF") [[apply]] { _x [[enableSimulationGlobal]] [[true]]; _x [[hideObjectGlobal]] [[false]]; };{{cc|This will show all entities inside the layer and enable their simulation}}</code> | ||
== Markers == | |||
The same method works for layers which contain markers.<br/><br/> | |||
1. Put all markers you wish to show later during the scenario into one layer and name the layer ''Markers''<br/> | |||
2. Open the [[Arma 3: Debug Console]] and execute the following code:<br/> | |||
<code>([[flatten]] [[getMissionLayerEntities]] "Markers") [[apply]] { [[_x]] [[setMarkerAlpha]] 1; };</code> | |||
== Attributes == | == Attributes == | ||
Revision as of 15:45, 14 May 2021
A layer is like a folder that can contain multiple entities of type object, group, trigger, waypoint, system or marker. Layers can be useful in various ways such as:
- Tidying up the editor view while editing by hiding the layers and their entities
- Grouping certain entities together thematically
- Preventing a group of entities from being accidentally edited by disabling transformation
- Dynamically creating the entities within a layer during the scenario
Creating a layer
There multiple ways to create layers:
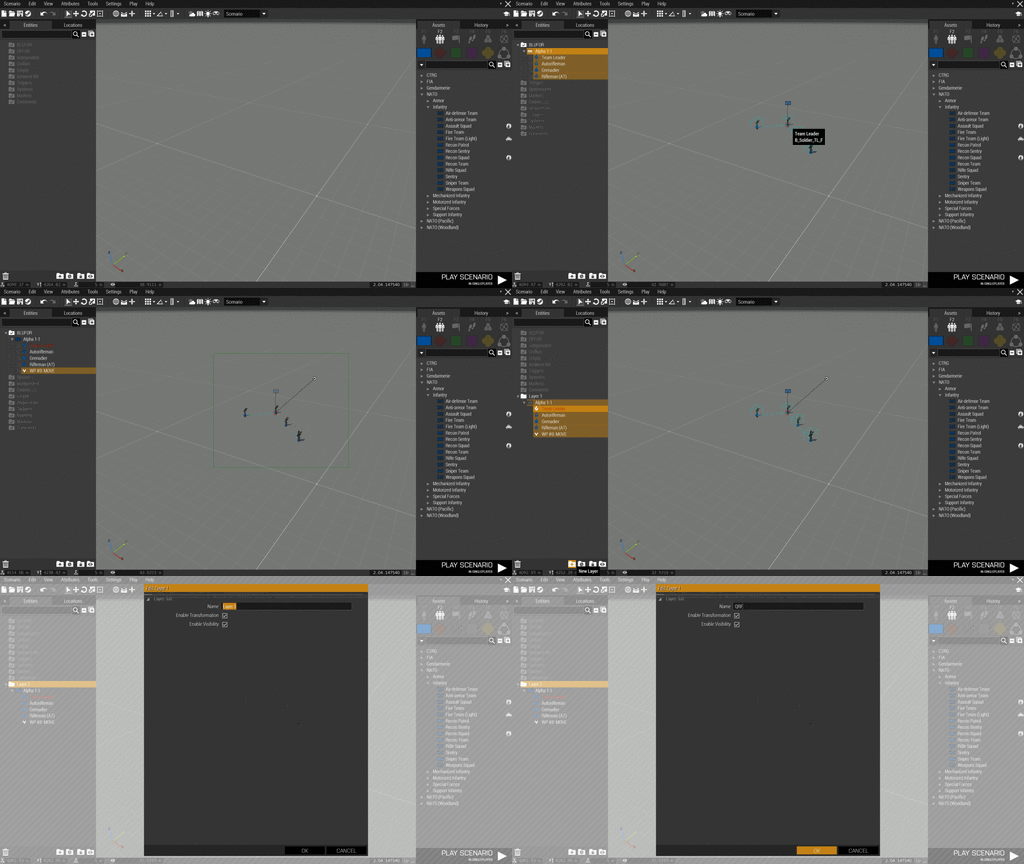
1. Select entities in the 3D or map view or the entity list (left panel) and press the New Layer button in the entity list
2. Use the add3DENLayer scripting command
Deleting a layer
Layers can be deleted by either selecting them in the entity list and pressing the Del key or using the Delete button in the entity list.
Dynamically create layer entities
One advantage of layers is that they can be used to hide or show all entities within the layer dynamically via scripting during a scenario.
1. Create a layer and fill it with entities as shown in the previous section.
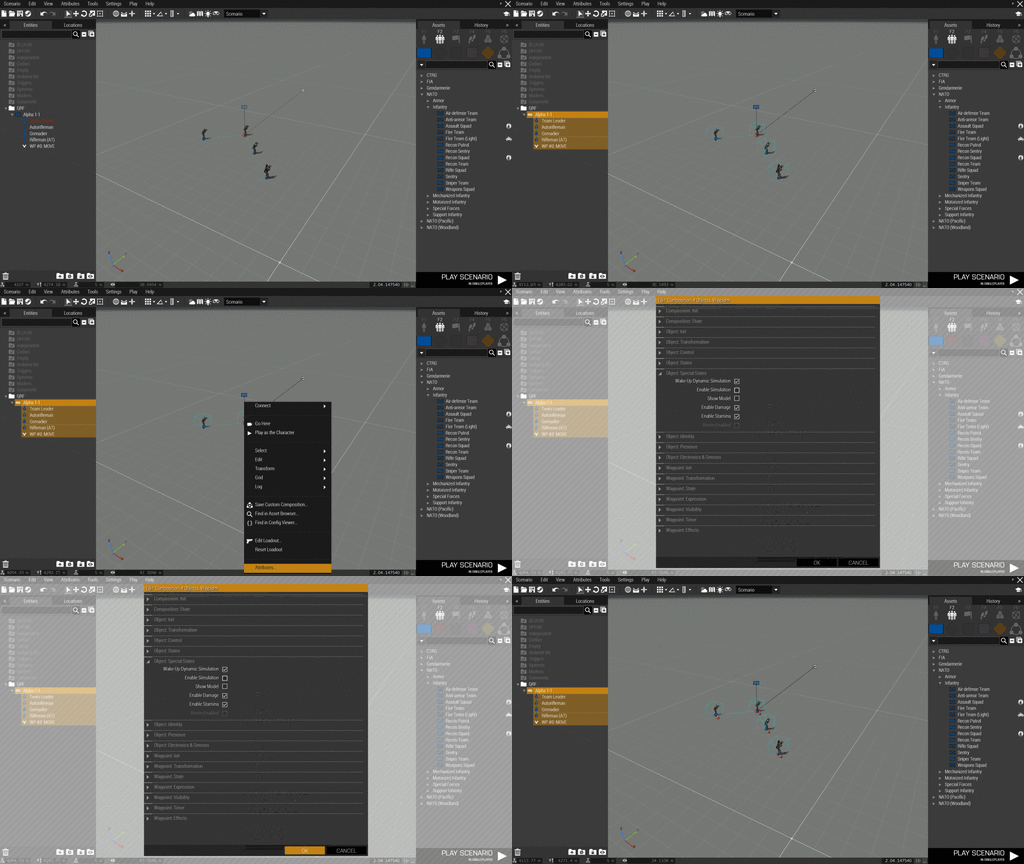
2. Select all entities in that layer and uncheck Show Model and Enable Simulation in the attributes
3. Preview the scenario
4. Open the Arma 3: Debug Console and execute the following code:
(flatten getMissionLayerEntities "QRF") apply { _x enableSimulationGlobal true; _x hideObjectGlobal false; };// This will show all entities inside the layer and enable their simulation
Markers
The same method works for layers which contain markers.
1. Put all markers you wish to show later during the scenario into one layer and name the layer Markers
2. Open the Arma 3: Debug Console and execute the following code:
(flatten getMissionLayerEntities "Markers") apply { _x setMarkerAlpha 1; };
Attributes
| Info | Development | |||
|---|---|---|---|---|
| Name | Category | Description | Property | Type |
| Name | Init | Name of the layer set in Eden Editor | Name | String |
| Enable Transformation | Init | If set to false (unchecked), the layer cannot be modified inside Eden Editor. | Transformation | Boolean |
| Enable Visibility | Init | If set to false (unchecked), the layer will not be shown inside Eden Editor. This will not affect visibility during the scenario! | Visibility | Boolean |


